The Document Window
The document window is the area outside the platform that is bordered by scroll bars and application controls.
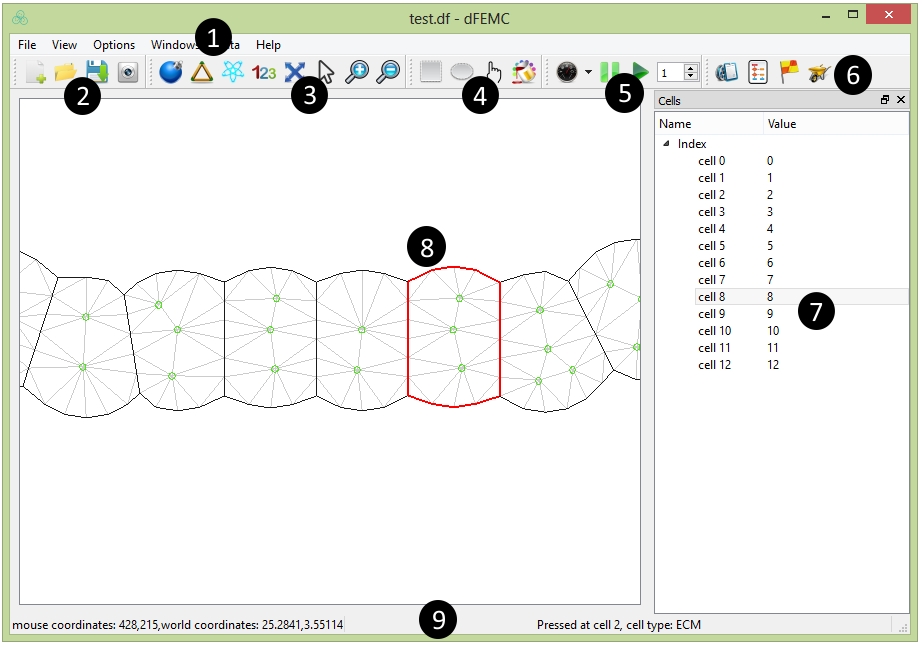
Circled numbers correspond to the numbers in the following table
| Description | |
|---|---|
| 1. Menu Bar | Lets you access tools and features using pull-down menu options. |
| 2. File Bar | Lets you create, open, or save a project. |
| 3. View Bar | Lets you choose view mode of the platform. |
| 4. Property Bar | Lets you select cells to change relative properties. |
| 5. Simulation Bar | Lets you control the simulation. |
| 6. Dataset Bar | Lets you customize and manage the data based on your mechanisms. |
| 7. Cell Panel | Display the cells in tree structure. |
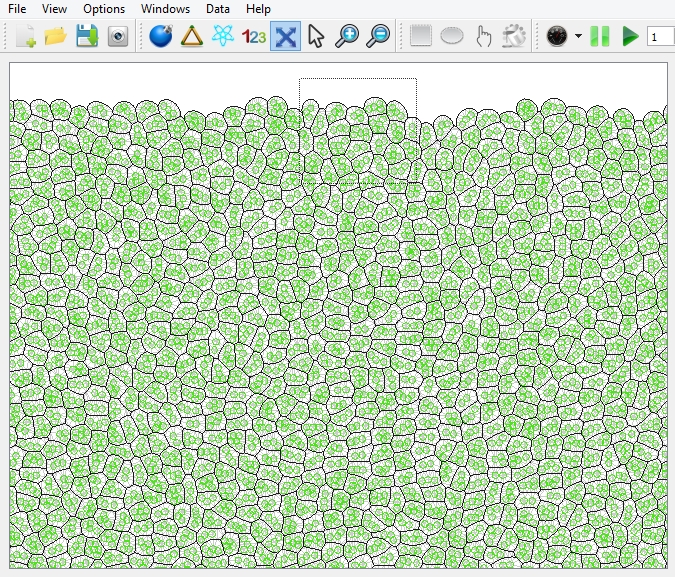
| 8. Platform | The platform is the rectangle work area for the simulation. |
| 9. Status Bar | Display the information of current action. |
Exploring the Tool Bar
You can use the tools in the toolbar which is under the menu to select and control cells or setup your cell behavior mechanisms. The following table provides descriptions of the tools in the CeldyFEM toolbar.
| Tool | Description |
|---|---|
| Create a new project. | |
| Open an existed project. | |
| Save the current project. | |
| Take a snapshot of the platform. | |
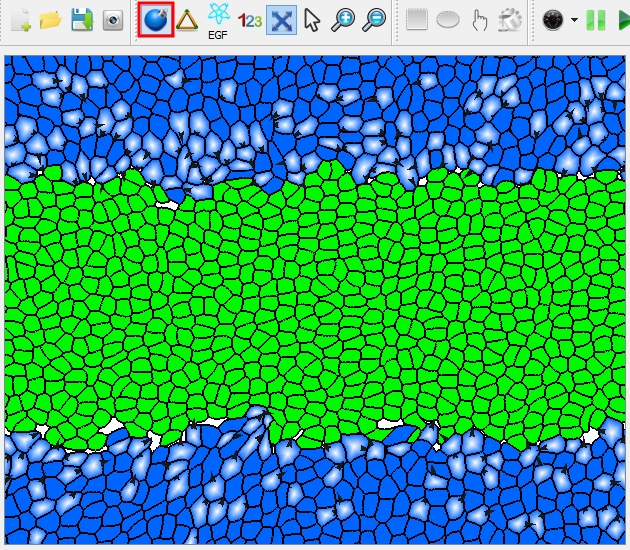
| Switch the view mode to "Solid": the cells are filled with color specific with cell type. | |
| Switch the view mode to "Inner-mesh": the cells are represented as the triangular mesh. | |
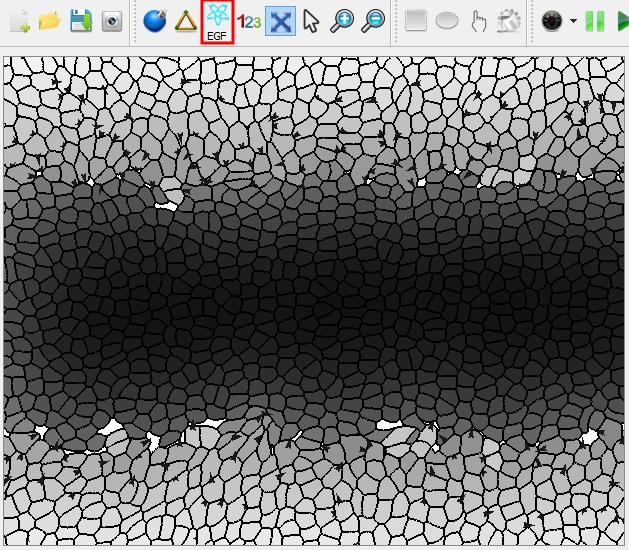
| Switch the view mode to "Gradient": the cells are filled with gray gradient according to the concentration of the selected cytokine. | |
| Active/Disactive the cell index. | |
| Active/Disactive the cell migration direction arrow. | |
| Zoom in the whole area inside the platform. | |
| Zoom out the whole area inside the platform. | |
| To create a rectangular selection. | |
| To create a oval selection. | |
| Change the cell property for selected cells. | |
| Change the color for selected cells. | |
| Select the simulation mode. | |
| Pause the simulation. | |
| Run or resume the simulation. | |
| Create cells and cytokines. | |
| Create network for cell-cytokine inter-relationship. | |
| Setup cell migration cue. |
Displaying the Tool Bar
The majority of the tools in the toolbar are inactive if you don't have openned or created a project. You can drag each bar to change its position within the main winodw. You can also pop out the cell panel by dragging it out of the main window or clicking the "flyout" button on the top right corner of the cell panel.
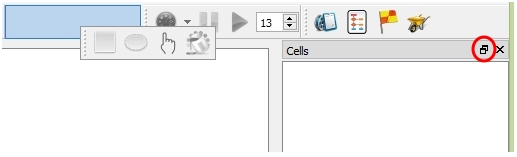
Draging tool box to the new position; Pop out the cell panel by clicking the flyout button (in red circle)
Creating Project
CeldyFEM allows users to create their own tissue. Choose File ![]() New or click the shortcut button on the toolbar to open the "New Tissue Diagram" panel.
New or click the shortcut button on the toolbar to open the "New Tissue Diagram" panel.
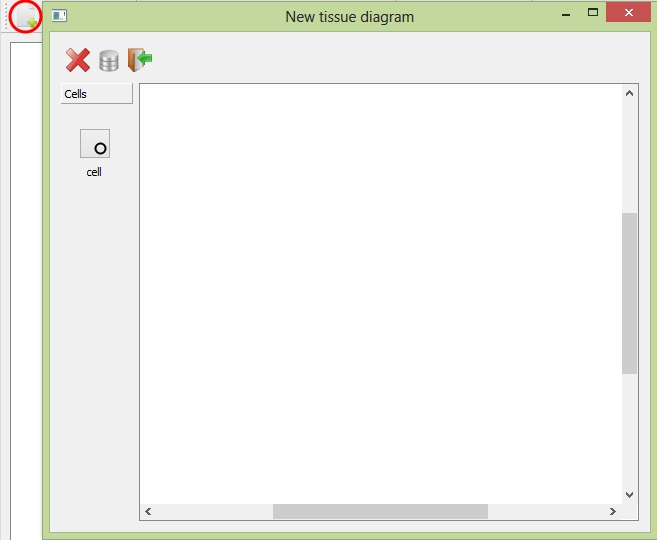
The "New Tissue Diagram" panel to create your own project
The following table provides descriptions of the tools in the panel.
| Tool | Description |
|---|---|
| Click to insert a new cell. | |
| Delete the selected cell. | |
| Save the tissue. | |
| Quit the panel. |
Click the "cell" button in the toolbox (left-side of the diagram window) and then press mouse in the window where you like to place the cell. If you wanna remove one inserted cell, select it and then click the "delete" button.
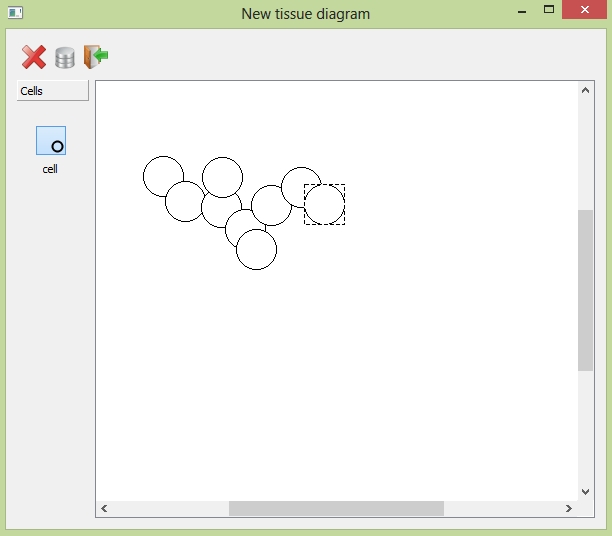
Insert the cells and drag them around within the diagram window.
Click the "save" button to generate a tissue according to the cells you have just inserted in the diagram window. Quit without saving by clicking the "close" button.
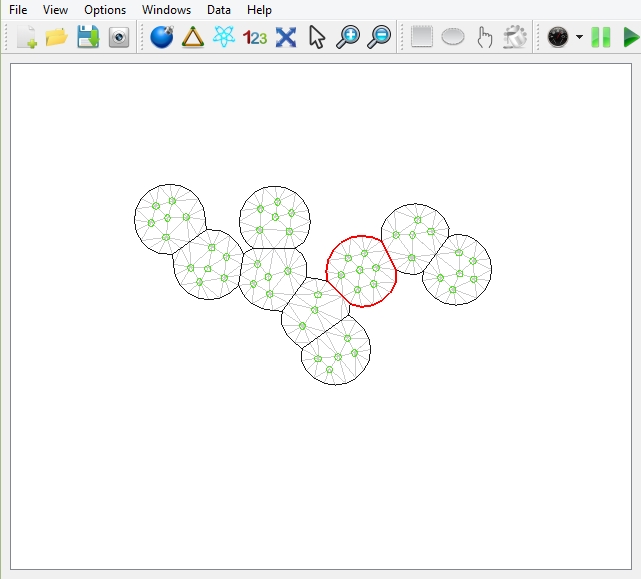
The tissue showing on the platform.
Opening Files
- 1. Choose File
 Open.
Open. 
 CeldyFEM displays the folder of the last file you opened.
- 2. In the Open dialog box, locate the file that you want to open.
- The CeldyFEM file must be with suffix ".df".
- 3. Click Open.
Saving Files
- Choose File Save.
Customizing Cells
CeldyFEM has a set of default cells and cytokines. It also allows users to construct their own cells and cytokines according to their needs. Choose Data ![]() Database or click the shortcut button on the toolbar to open the "cell-cytokine manager".
Database or click the shortcut button on the toolbar to open the "cell-cytokine manager".
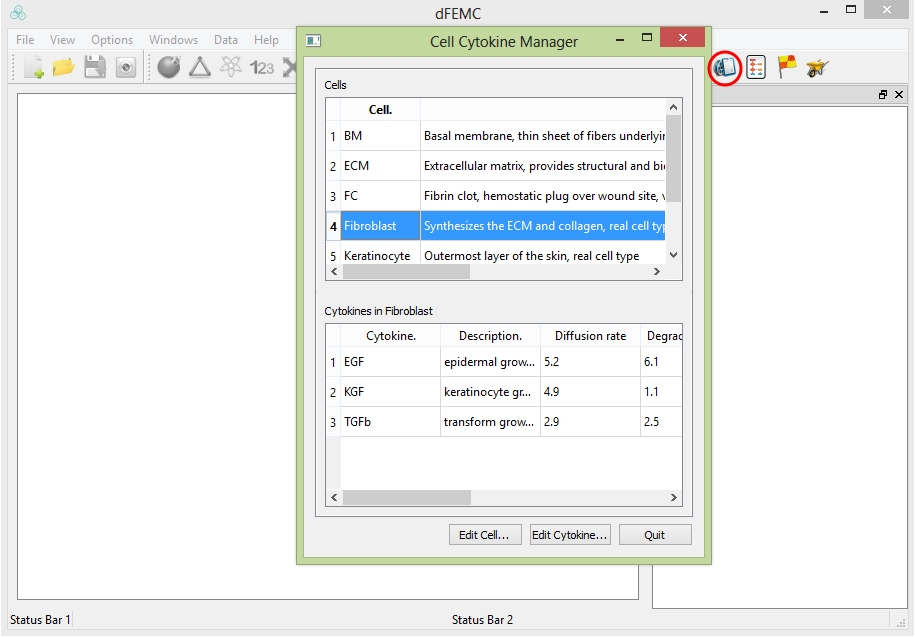
The cell-cytokine manager shows the cells and cytokines you can use
There are two blocks in the manager: the cell block includes all the cells and the cytokine block shows you the cytokines synthesized from the cell you choose from the cell block. Click the four button "First", "Previous", "Next", "Last" on the top to go through all the cells. Click "Delete" button on the bottom to delete any cell you don't wanna keep. Click the "Edit Cell..." button to edit the existed cell or add a new cell.
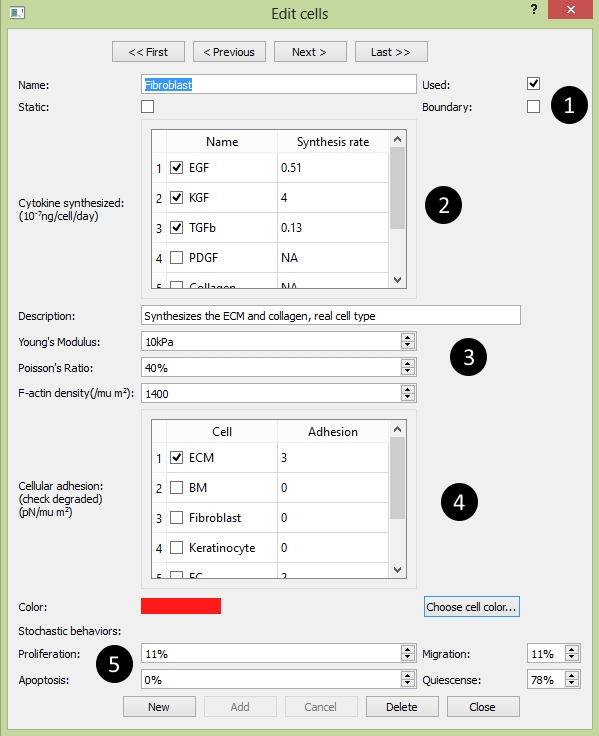
The Edit Cell panel: circled number correspond with numbers as followed
- 1. The Name Section:
 Name: the cell's name
- Used: to use the cell in this project
- Static: if the cell is completely static during the simulation
- Boundary: if the cell is on the boundary of the tissue
- 2. The Cytokine Section:
- Showing the cytokines synthesized by the cell
- 3. The Material Section:
- Description: describe the cell's biological function
- Young's Modulus: the cell's Young's modulus
- Poisson's Ratio: the cell's poisson's ratio
- F-actin density: the cell's filament actin density
- 4. The Adhesion Section:
- Showing the adhesion strength between cells and the cells which could be degraded by this cell are checked
- 5. The Behavior Section:
- Color: the cell's color
- Proliferation: the proliferation probability
- Migration: the migration probability
- Apoptosis: the apoptosis probability
- Quiescense: the quiescense probability
Click "New" button to create a new cell type and setup the properties through the 5 sections. Click "cancel" button to cancel or "Add" button to add the created cell into the database for your project.
Customizing Cytokines
Click "Edit Cytokine..." button in the cell-cytokine manager to edit the existed cytokine or to add a new cytokine.
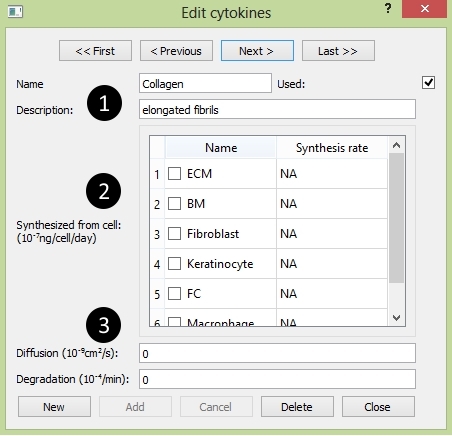
The Edit Cytokine panel: circled number correspond with numbers as followed
Click the four button "First", "Previous", "Next", "Last" on the top to go through all the cytokines. Click "Delete" button on the bottom to delete any cytokine you don't wanna keep.
- 1. The Name Section:
- Name: the cell's name.
- Used: to use the cytokine in this project.
- Description: describe the cytokine's biological function.
- 2. The Synthesis Section:
- The cells which synthesize the cytokine are checked.
- 3. The Property Section:
- Diffusion: the cytokine's diffusion rate.
- Degradation: the cytokine's degradation rate.
Click "New" button to create a new cytokine type and setup the properties through the 3 sections. Click "cancel" button to cancel or "Add" button to add the created cytokine into the database for your project.
Customizing Network
CeldyFEM has a diagram panel for you to build up your network of cell-cytokine interrelationship. Choose Data ![]() Link Diagram or to click the shortcut button on the toolbar to open the "network" panel.
Link Diagram or to click the shortcut button on the toolbar to open the "network" panel.
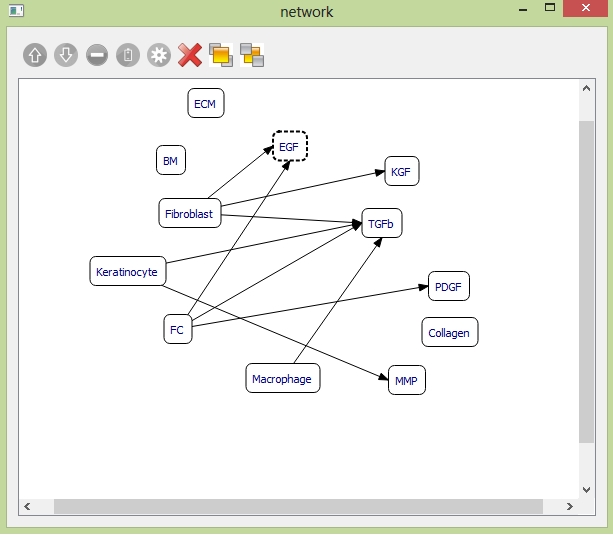
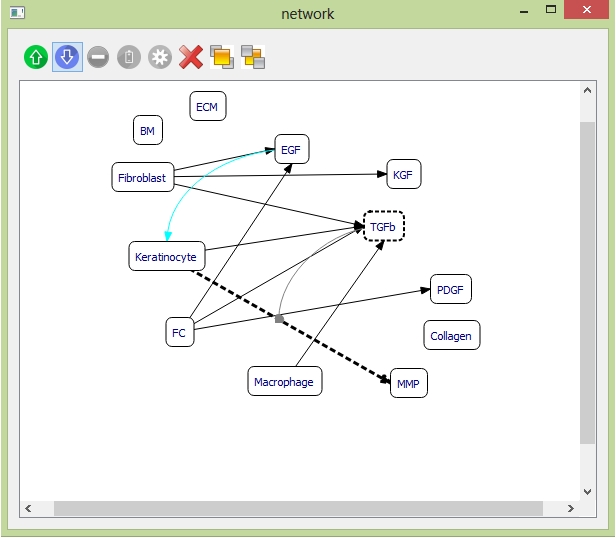
The network panel to build up cell-cytokine interrelationship
Each block represents one cell or cytokine. Any cell or cytokine you uncheck the "use" checkbox in the "cell-cytokine manager" will not show up in the "network" panel. The dark line indicates the synthesis relationship you have set up in the previous two sections. You can't add or delete synthesis relationship in "network" panel. If you wanna make any change to the synthesis relations, you need to go back to the "cell-cytokine manager" to do it. You can select the object by pressing left button of your mouse or to use selection box by moving your mouse track across the window. You can drag the selected objects to any place within the window. You can also add new relationship between the cell and cytokine based on your purpose. The following table provides descriptions of the tools in the Network panel.
| Tool | Description |
|---|---|
| Add one up-regulation. | |
| Add one down-regulation. | |
| Add one inhibition. | |
| Add one promotion. | |
| Set parameters for one relationship. | |
| Delete one relationship. | |
| Push one object back. | |
| Drag one object front. |
Examples of adding relationships between cells and cytokines:
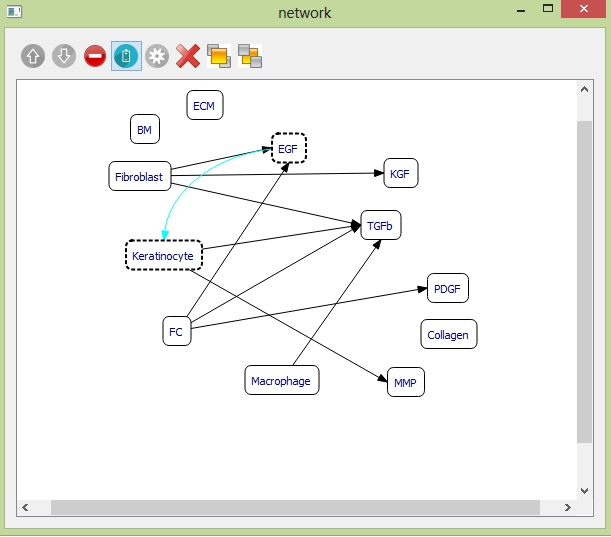
Example: to add one promotion relationship between "EGF" and "Keratinocyte". Select the objects "EGF" and "Keratinocyte" and click the "promotion" button on the toolbar. Then the curve indicating "EGF" promoting "Keratinocyte" is generated.

Select the promotion curve, and click the "settings" button on the toolbar. Set the promoted "Keratinocyte" behaviors under effects of "EGF" and corresponding scaling factors.
Example: to add one down-regulation relationship between "TGFb" and synthesis of "MMP". Select the objects "TGFb" and the synthesis relationship between "Keratinocyte" and "MMP". Click the "down-regulation" button on the toolbar. Then the curve indicating "TGFb" down-regulating the synthesis of "MMP" is generated.
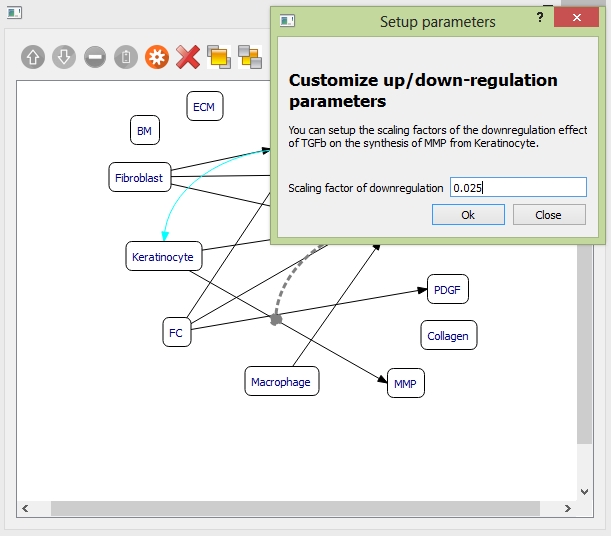
Select the down-regulation curve, and click the "settings" button on the toolbar. Set the down-regulation scaling factor.
Customizing Migration Cue
CeldyFEM provides three migration mechanisms for choose: chemokinesis, chemotaxis, and cohesotaxis. Choose Data ![]() Migration Cue or click the shortcut button on the toolbar to open the "Direction Cue Setup" panel.
Migration Cue or click the shortcut button on the toolbar to open the "Direction Cue Setup" panel.
Here are four tabs in the "Direction Cue Steup" panel: "Chemotaxis", "Cohesotaxis", "Chemokinesis", and "Mechanisms". In tab "Chemotaxis", for each cell type, you can choose the cytokine type as the cue to guide cell migration.
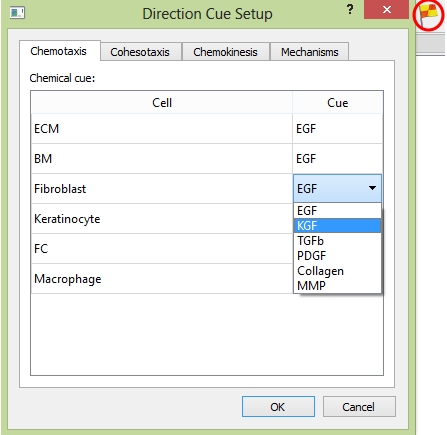
The "Chemotaxis" tab.
In tab "Cohesotaxis", for each cell type, you can customize the adhesion strength fraction, the adhesion strength with this cell is then that fraction multiplied by the real number; and signal transmission probability, the mechanical signal with such probability to transmit to that cell.
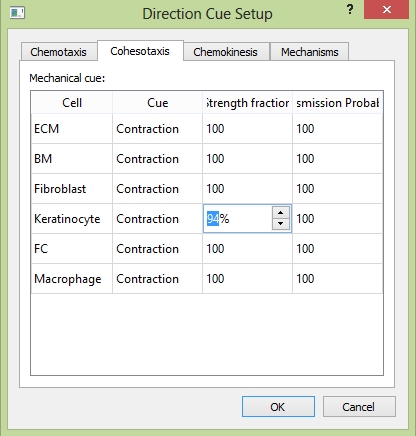
The "Cohesotaxis" tab.
In tab "Chemokinesis", for each cell type, you can choose the cytokine type as the cue to trigger cell migration, the difference from "Chemotaxis" is that the cell will randomly choose its migration direction.
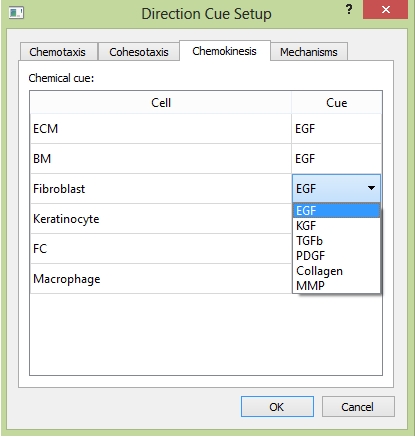
The "Chemokinesis" tab.
In tab "Mechanisms", you can choose the migration mechanism for each cell type, in addition to "Chemotaxis", "Cohesotaxis", and "Chemokinesis", there is one more strategy called "Static", that the cell will not move but to keep static.
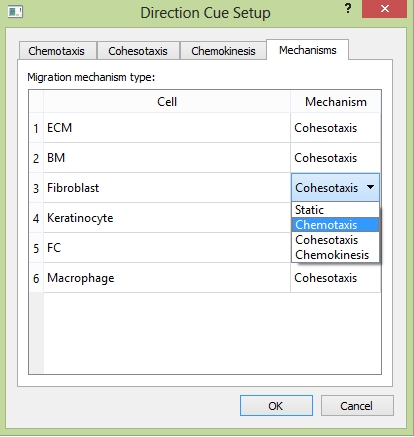
The "Mechanisms" tab.
Move
You can use your mouse to move the tissue around. Click any position within the platform and then drag to the position you like. You can also click View ![]() Zoom in/out or the shortcut on the toolbar to zoom in or out the view.
Zoom in/out or the shortcut on the toolbar to zoom in or out the view.
Select
There are three types of selection method for you to select cells.
- 1. Click with left button of the mouse.
- The cell clicked is selected.
- 2. Choose Option Rectangular.
- Drag the mouse to generate a selection box to select cells.
- 3. Choose Option Oval.
- Drag the mouse to generate a selection ellipse to select cells.
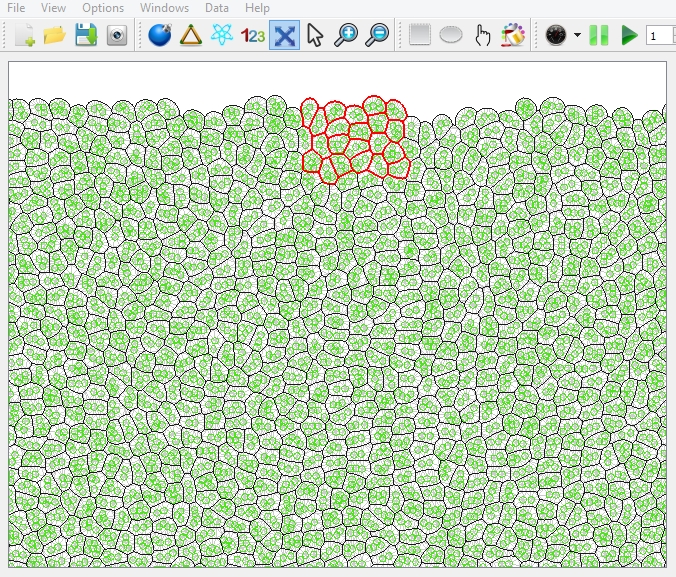
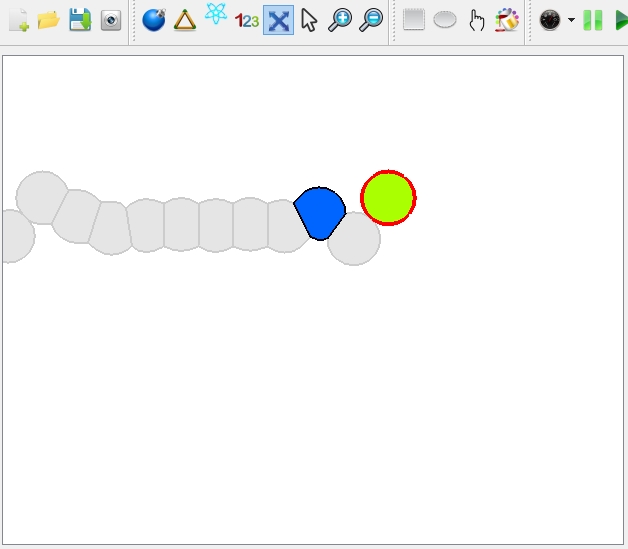
The selected cells are marked with bold red boundaries.
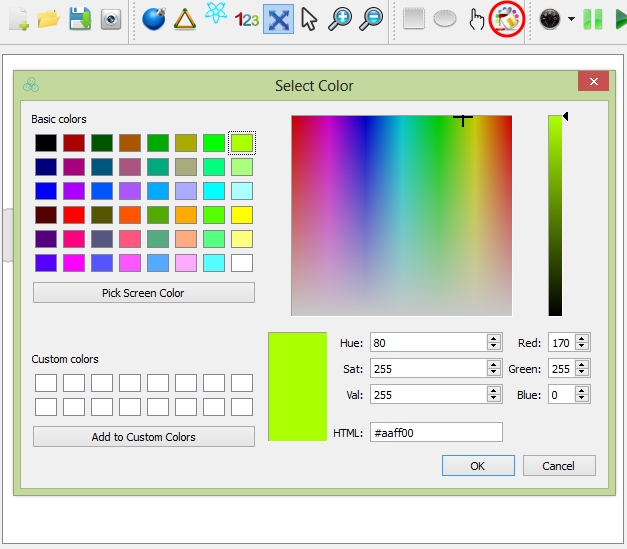
Once you select the cells, you can change their cell types by choosing Options ![]() "select cell type" or the shortcut in the toolbar; or you can change their cell color by choosing Options
"select cell type" or the shortcut in the toolbar; or you can change their cell color by choosing Options ![]() "select cell color" or the shortcut in the toolbar.
"select cell color" or the shortcut in the toolbar.

Switch
You can also switch between the view modes according to your interested.

Snapshot
Choose File ![]() Snapshot to get a snapshot of the platform.
Snapshot to get a snapshot of the platform.
Simulation Mode
There are three different simulation modes that user can choose dure simulation: "Model", the normal and default option that simulation runs under the mechanism setup by the user; "Grow", every cell in the whole tissue is continuously growing and dividing; "Relax", every cell in the whole tissue keeps maintain the default cell area but ignoring the mechanism.
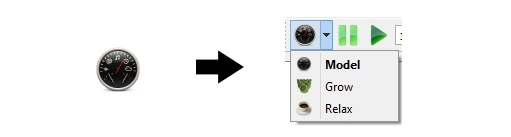
Access the simulation mode by clicking the Mode Selection on the Simulation Bar
Simulation Time
Here is a spin box next to the Run Simulation button. User can setup the simulation time by choosing the number where each 1 represents one hour.